Chicken is arguably the most versatile protein in the culinary world. From the bustling night markets of Southeast Asia to the refined bistros of Paris, it serves as a blank canvas upon which chefs and home cooks alike paint a myriad of flavors. Its popularity stems from its accessibility, lean nutritional profile, and the ease with which it adopts different cooking styles—whether roasted, fried, poached, or grilled.
However, because chicken is so ubiquitous, it is often taken for granted. Many home cooks struggle with the dreaded “dry breast” or rubbery skin. To truly master chicken recipes, one must understand the anatomy of the bird, the science of heat, and the importance of preparation. This guide is designed to elevate your kitchen skills, transforming simple poultry into a gourmet experience.
Understanding the Anatomy: White vs. Dark Meat
The first step in any chicken recipe is choosing the right cut. The bird is divided into two main categories: white meat and dark meat, and they behave very differently under heat.
White Meat (Breasts and Wings): These muscles are used for short bursts of energy. They are lean and contain very little connective tissue. Because of their low fat content, white meat cooks quickly but dries out almost instantly if overcooked. The ideal internal temperature for a chicken breast is 165°F (74°C), but many professionals pull it off the heat at 160°F to allow for carryover cooking.
Dark Meat (Thighs and Drumsticks): These muscles are used for standing and walking, meaning they contain more fat and connective tissue (collagen). This makes them much more forgiving. Dark meat thrives on longer cooking times, which allows the collagen to melt into gelatin, resulting in a juicy, tender bite. Thighs are often at their best when cooked to an internal temperature of 175°F to 185°F.
The Secret to Succulence: Brining and Seasoning
If you want your chicken to taste like it came from a five-star restaurant, you cannot skip the preparation phase. The most effective way to ensure moisture is through brining.
The Wet Brine: A solution of water, salt, sugar, and aromatics. Submerging chicken in a brine for even two hours allows the salt to break down some of the muscle fibers, drawing moisture into the meat. This is particularly effective for lean cuts like the breast.
The Dry Brine: This involves rubbing the chicken with a generous amount of kosher salt and letting it sit uncovered in the refrigerator for several hours or overnight. This serves two purposes: the salt seasons the meat deeply, and the cold air of the fridge dries out the skin. Dry skin is the absolute prerequisite for achieving that coveted glass-like crispiness when roasting or pan-searing.
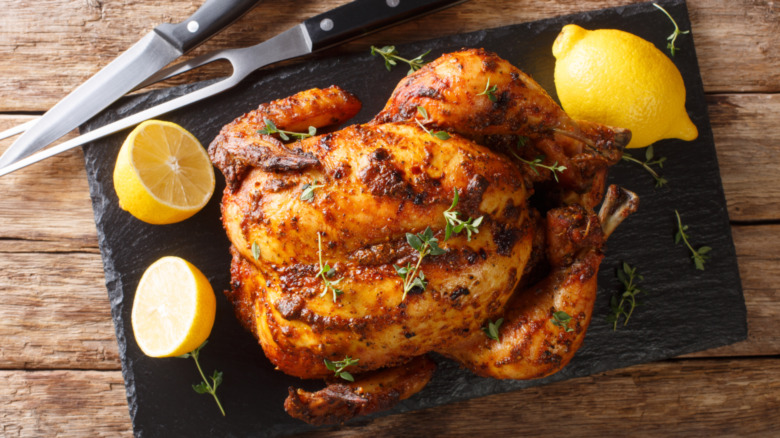
Masterclass 1: The Perfect Herb-Roasted Whole Chicken
A perfectly roasted whole chicken is the hallmark of a skilled cook. It is a meal that feels celebratory yet remains humble.
- Preparation: Ensure the chicken is bone-dry. Stuff the cavity with a halved lemon, a head of garlic cut crosswise, and a bunch of fresh thyme or rosemary.
- The Fat: Rub the skin with softened butter or high-smoke-point oil. Season aggressively with salt and cracked black pepper.
- The Heat: Start the chicken in a preheated oven at 425°F (220°C). High heat is essential for browning the skin.
- The Test: Roast until the juices run clear and the thickest part of the thigh reaches the proper temperature.
- The Rest: This is the most forgotten step. Let the chicken rest for at least 15 minutes before carving. This allows the juices to redistribute; if you cut it immediately, all that moisture will end up on the cutting board instead of in the meat.
Masterclass 2: The Pan-Seared Chicken Thigh
For a quick weeknight meal that packs a flavor punch, look no further than the skin-on, bone-in chicken thigh.
- The Cold Start: Place your seasoned thighs skin-side down in a cold cast-iron skillet, then turn the heat to medium. This “cold start” allows the fat to render slowly, resulting in exceptionally crispy skin without burning.
- The Sear: Leave them alone for 8 to 10 minutes. Once the skin is golden and releases easily from the pan, flip them.
- The Finish: Add a knob of butter, a few cloves of smashed garlic, and a sprig of thyme to the pan. Baste the chicken with the foaming butter for a few minutes until cooked through.
- The Sauce: Remove the chicken and use the brown bits (the fond) left in the pan to make a quick sauce with a splash of white wine or chicken stock and a squeeze of lemon.
Common Pitfalls to Avoid
Even seasoned cooks make mistakes. Here are the three most common errors when preparing chicken:
- Crowding the Pan: If you put too many pieces of chicken in one skillet, the temperature drops and the meat begins to steam in its own juices rather than searing. This leads to gray meat and soggy skin.
- Cooking Straight from the Fridge: Cold meat hits a hot pan and the fibers tense up. Let your chicken sit at room temperature for 20 minutes before cooking for a more even result.
- Washing the Chicken: Modern food safety guidelines strongly advise against washing raw chicken. It does not remove bacteria; instead, it splashes contaminated water across your sink and countertops. High heat is the only thing that kills bacteria.
Conclusion
Mastering chicken recipes is not about memorizing a hundred different ingredients; it is about mastering the techniques of temperature control and moisture retention. By understanding the difference between cuts, respecting the power of salt, and allowing the meat to rest, you can turn a basic supermarket staple into a culinary masterpiece. Whether you are roasting a whole bird for a Sunday family dinner or searing thighs for a quick solo meal, these principles remain the same.